A part list is also known as a Bill of Materials (BOM). We use the terminology interchangeably throughout the Aligni documentation. Since any part can have a part list, we’ll sometimes refer to one that does as an assembly and the parts on its part list as its subparts.
The part list below can be viewed in our online demo database.
View this Part List
View the Kit List
View the Cost Sheet
BOM Views

There are three available BOM views which may be selected by clicking on the drop-down arrow on the BOM tab:
- Part List – Hierarchical view (tree view)
- Kit List – Flatted view
- Cost Sheet – Cost analysis view
Hierarchical View (Tree View)
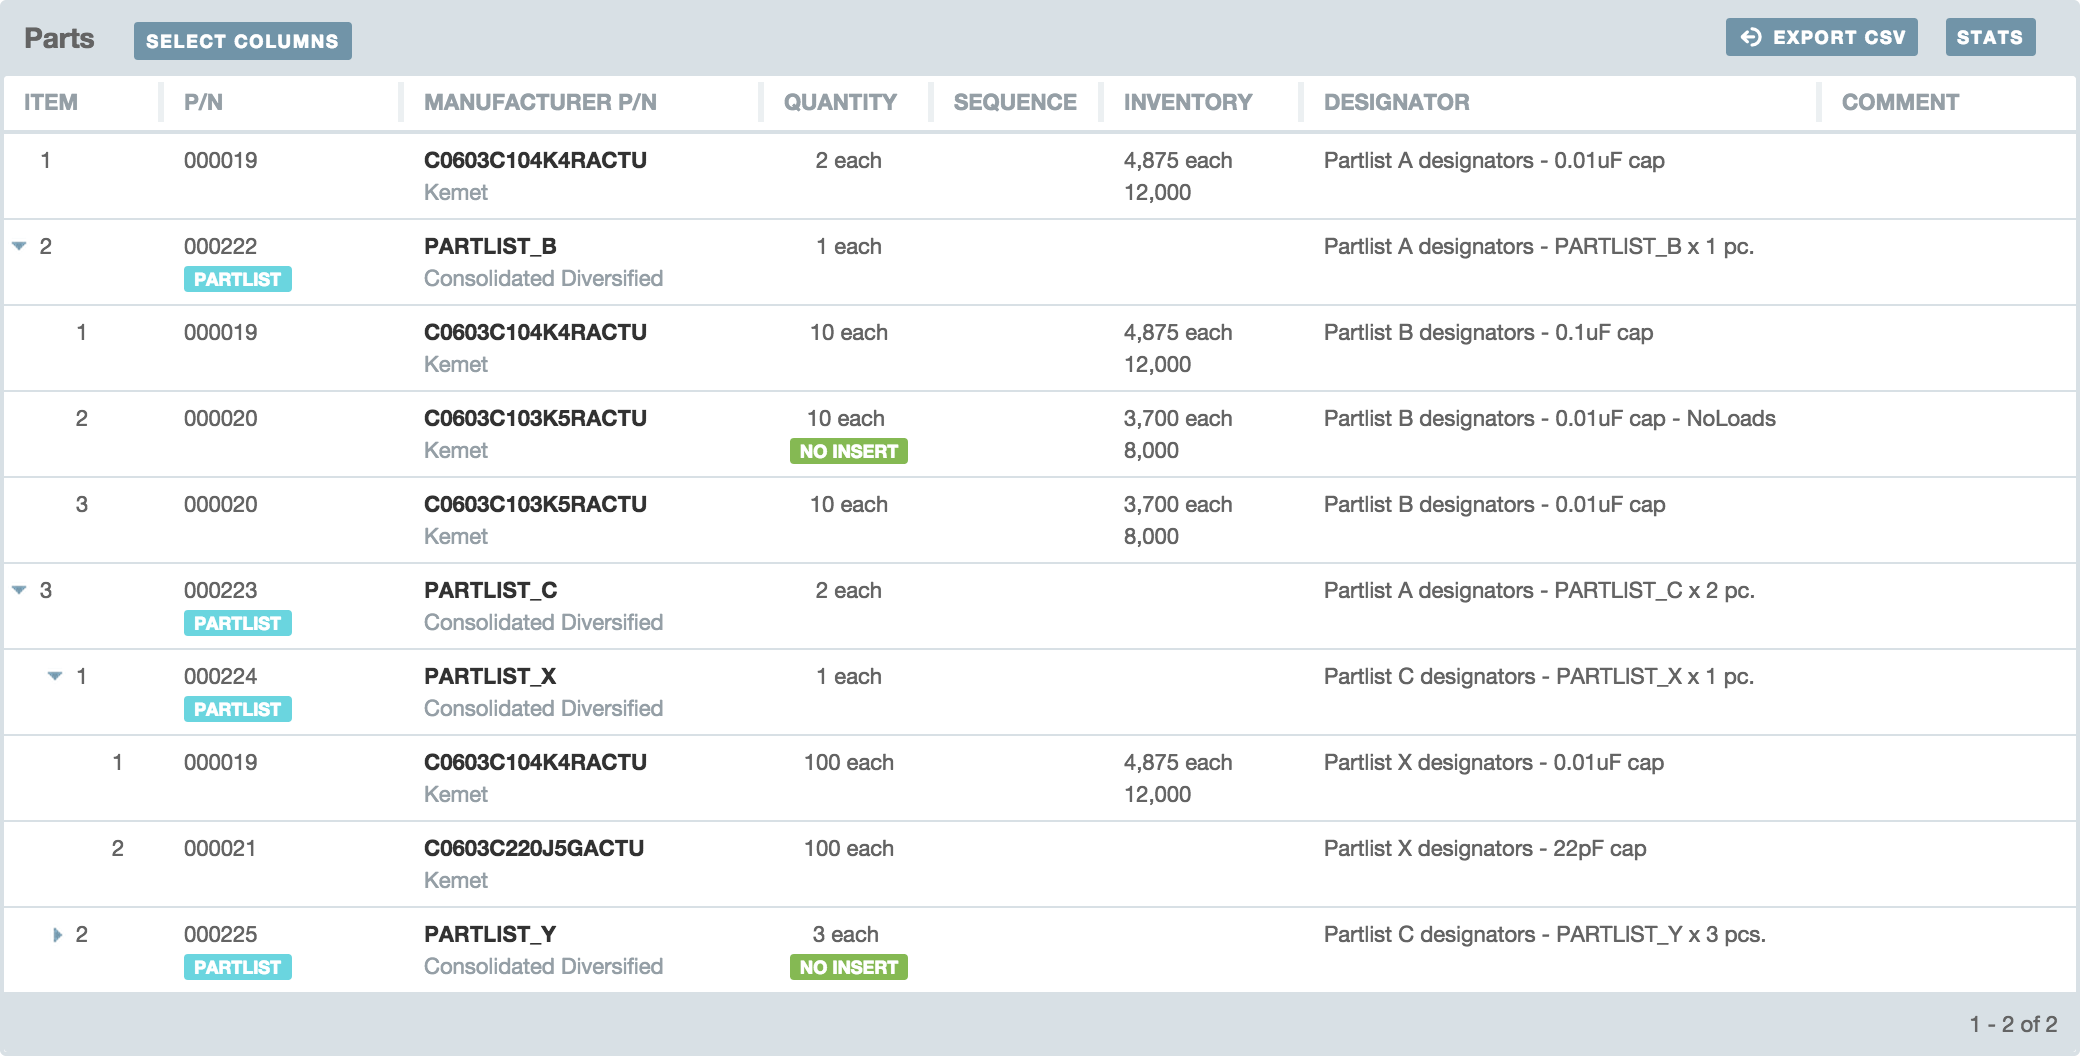
The full hierarchy of a part list is visible on the part list page. Any subparts that have part lists can be further expanded to show their part list as long as they have the basic parameter “Manufactured Here” checked. For more information on this parameter, see the Basic Parameters page.
Kit List View (Flattened View)
The kit list is a flattened collection of all the parts on an assembly and, recursively, all of its subassemblies. A kit list is a great way to see all the part dependencies of an assembly. Additionally, you can specify a target quantity for a kit list and Aligni will multiply out the quantities for all parts. This can be particularly helpful when adding items on the kit list to a Part Cart.
An example kit list is shown below. The Total column displays the total quantity of each part required for a single piece of the assembly. The Assembly Qty column displays the quantity required for each piece of each subassembly. The Designator column shows the designator information from each subassembly.

Example : Kitting Inventory
You can use the Kit List for kitting inventory to be transferred to a contract manufacturer for a consignment build. To do so, follow these steps:
- Create a New Transfer and setup the source and destination locations. The new transfer will become your active part cart.
- Visit the Kit List for the assembly you are kitting and enter the target quantity.
- Add All Items on the page to the part cart by clicking on the plus sign in the part cart at the top-left of the page.
Following these steps, the inventory transfer will be populated with the items on the kit list and the quantities requested for the transfer will be set to the total quantities for the target quantity specified.
Managing Subparts on an Assembly
You can only manage the part list of an assembly when the revision is in the Draft phase. Once a revision is released, you cannot make changes to the part list.
When you import a Part List, Aligni is not creating new parts in your database. It is linking existing parts as components on an assembly. Therefore, these parts must already exist in your database. If you need to create new parts, use the Import Parts feature.
Adding Subparts
There are three ways to add parts to an assembly:
- Manually adding one part at a time – For simple part lists, you can manually add parts to the part list by clicking on the “Add a Subpart” link (the small “+” sign at the right side of the Parts table header) and entering the subpart details accordingly.
- Importing a BOM from CSV – The part list for many assemblies such as printed circuit boards or complex mechanical parts will often be defined in a CAD package and can be exported to list of parts in CSV format. You can import such a part list into Aligni by clicking on Import CSV and following the steps. Aligni will match parts by internal part number or manufacturer’s part number during import. Other fields such as quantity, reference designators, and comments are imported as well.
- Using the Part Cart – A part list may also be selected as a Part Cart target allowing you to browse or search your database and add parts.
Rearranging Parts
To rearrange the order of parts on the list, click Rearrange Parts and drag-and-drop the part rows to set the order.
Exporting a Part List
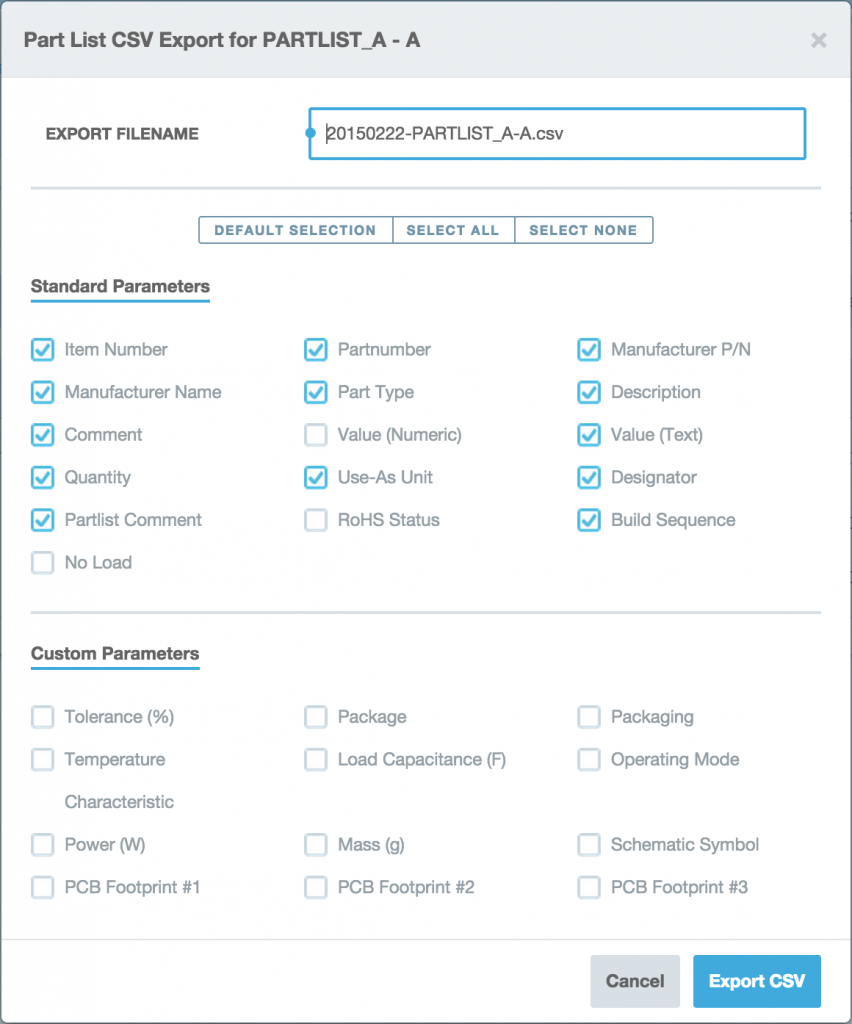
Click on the Export CSV link to download a CSV file of the part list contents. The dialog includes a list of all available part parameters that will be included in the CSV and separates basic (or native) parameters from your site-specific custom parameters.
You may specify a filename for the exported CSV file. By default, the filename is the current date (in YYYYMMDD format) prefixing the part’s manufacturer part number.
Export Templates
Part List Export Templates may be configured in the site setting pages. Here, you may configure standardized templates for consistency in communicating with your suppliers. A list of available templates is presented in the export dialog.
Revisions
Part lists are revisioned data just like the revisioned parameters associated with the part. Therefore, different revisions have different part lists. You can use the part list comparison tool to compare any tags from any two part lists.
Additional Part List Features
Quantity and Cost Charts
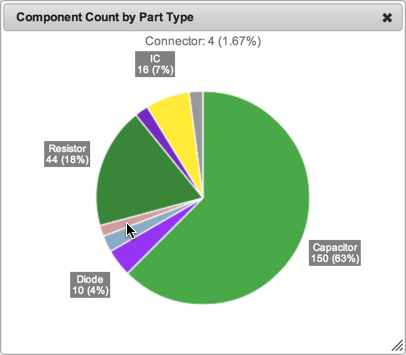
Click on the pie chart icons to see a graphical breakdown of the part list as part count by part type or cost by part type.
Inventory Assistant
Click on Inventory Assistant to initialize the inventory assistant with the parts from the part list. The assistant helps you set minimum inventory levels for each part so you can maintain parts on hand while balancing desired inventory values with expected lead times.
Builds
When you initiate a build, the part list is used to allocate the parts for the build. Aligni associates a specific part revision with the build and carries it through to completion. You can change the build’s part revision any time the build is in the plan / schedule phase. You will not be able to delete a part revision if it is being used on an active build.
Computations
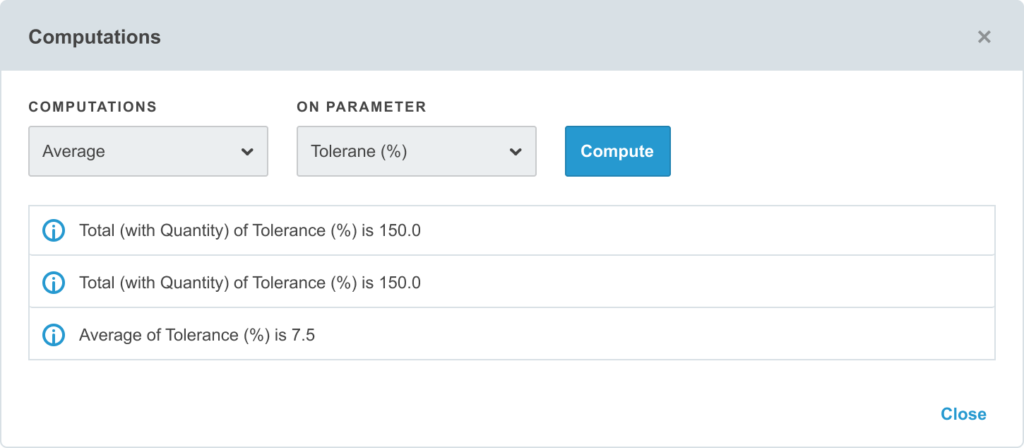
Use computations to perform operations on custom parameters such as:
- Minimum
- Maximum
- Average (optionally weighted by quantity)
- Total (optionally weighted by quantity)
Each computation is performed based only on active parts. No-Load parts are not factored into results.

