Aligni has the ability to create and distribute RFQs to vendors in the system. Follow the steps below to create one in the Aligni demo system!
Adding the parts
Step 1
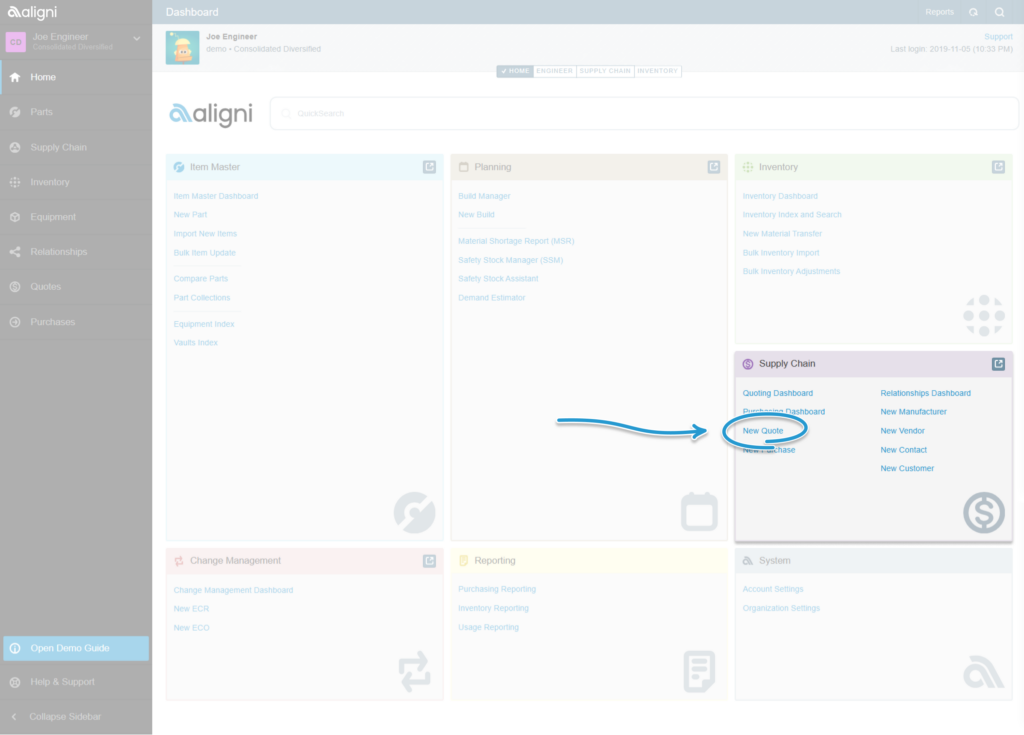
On the Home dashboard, in the ‘Supply Chain’ section at the lower right of the screen, click on the ‘New quote’ link. This opens the RFQ screen.
Step 2
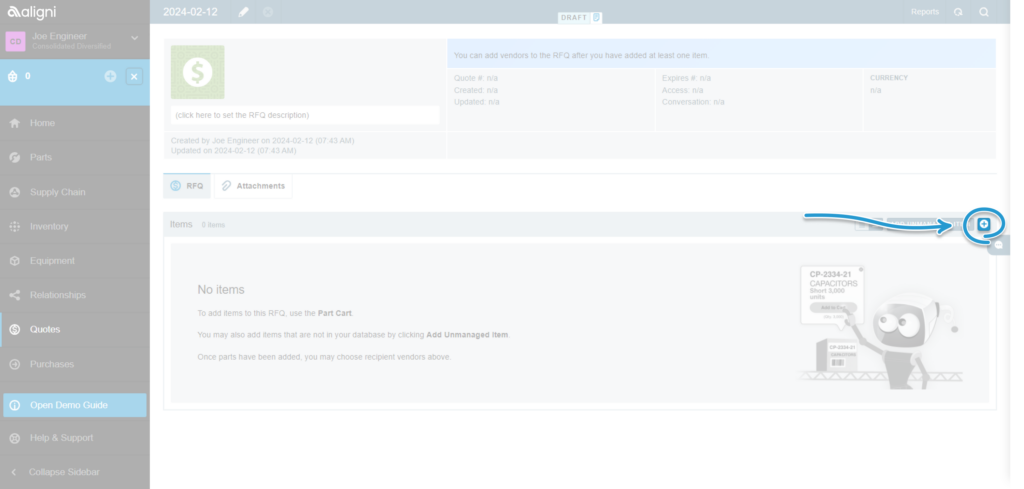
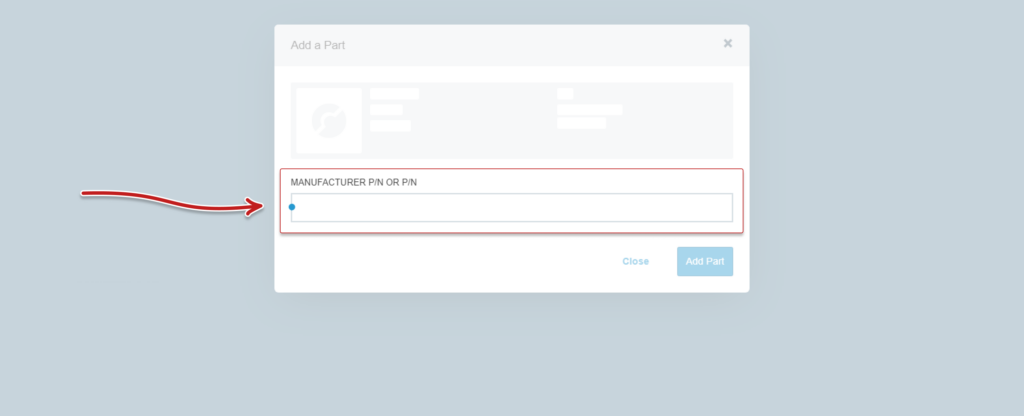
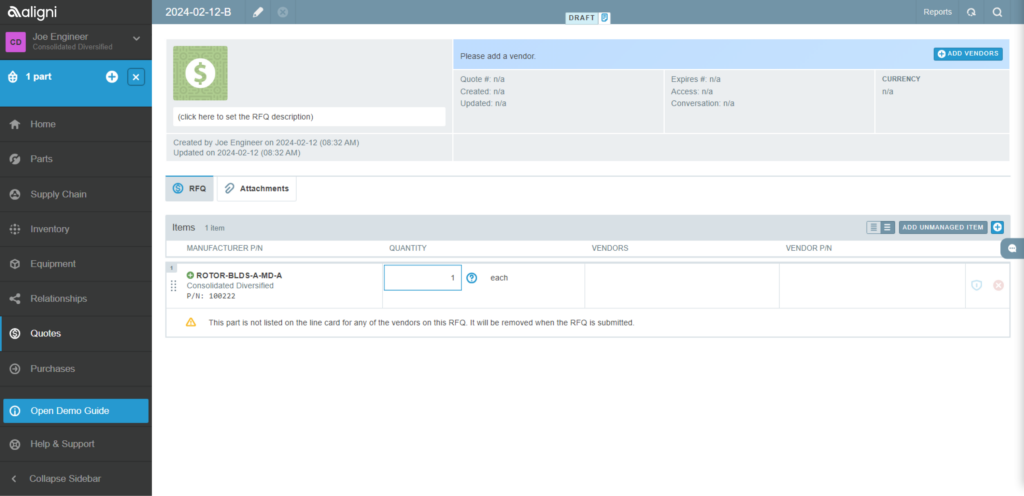
On the RFQ screen, click the ‘Add new part’ button at right of the Items section bar. It is shown as the blue cross in a white circle. This opens the ‘Add a Part’ form.
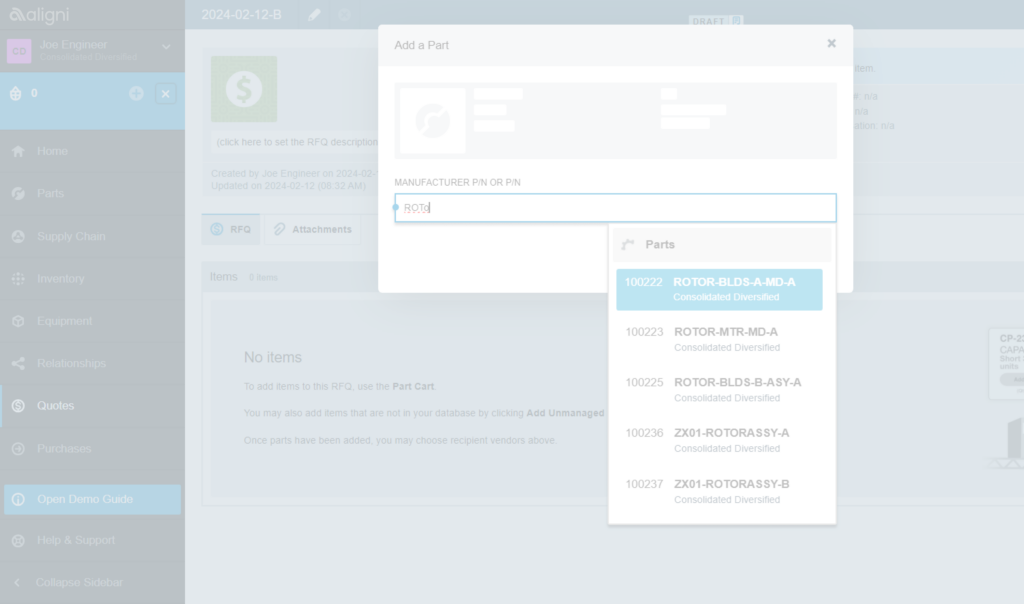
Tip: Aligni offers part suggestions as numbers or characters are typed in the form fields to quickly locate parts.
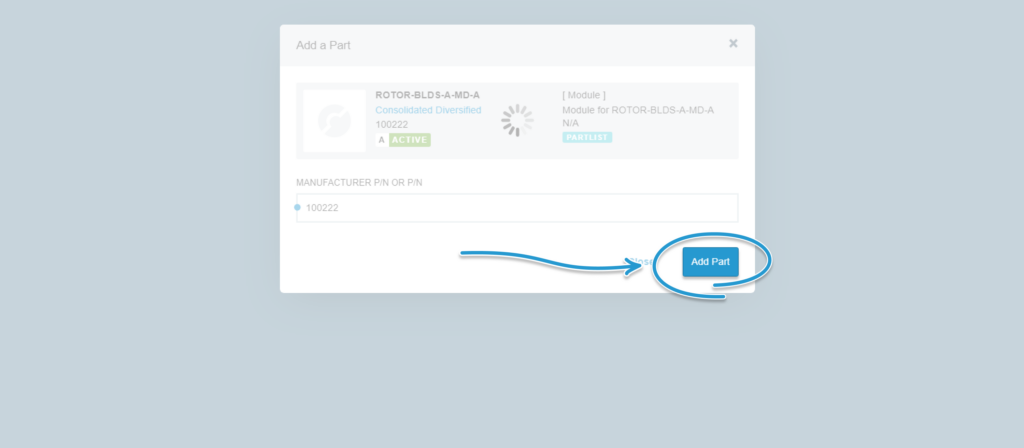
Tip: Aligni will default to the Manufacturer part number (100222) rather than the Part Number (ROTOR-BLDS-A-MD-A) in the form field, once a product has been selected.
Step 4
Once the complete number is entered or the correct part is suggested and clicked on, click the ‘Add Part’ button.
Step 5
The ‘Add a Part’ form will close and the newly selected part will appear in the ‘Items’ section of the RFQ screen.
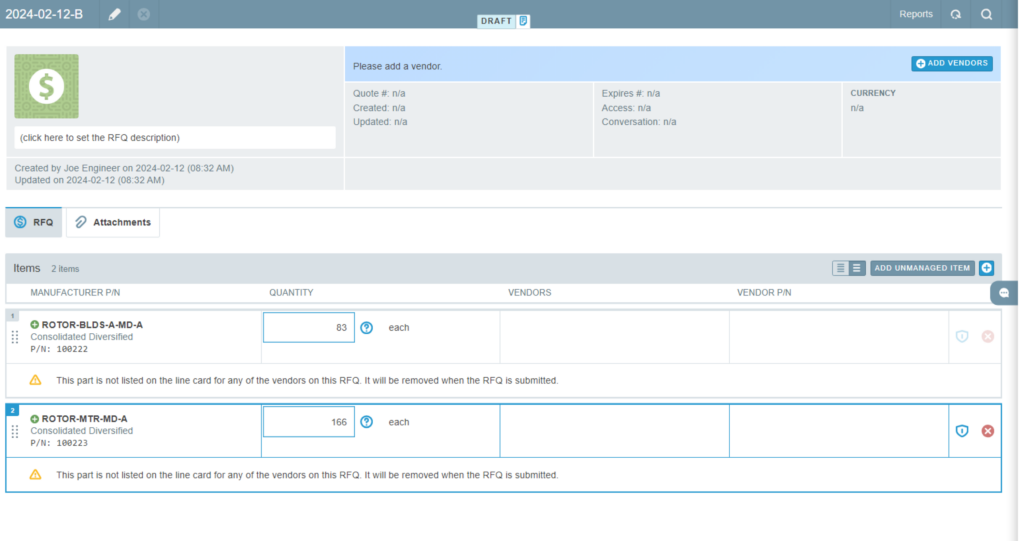
To add more parts, simply click the ‘Add new part’ button again and follow the steps above. This is what we have done to add the second part on the RFQ screen.
Step 6
We have reset the quantities needed from one each to 83 and 166, respectively.
Tip: Once the parts are in the Items section of the RFQ screen, their quantities can be adjusted.
The next step is to add the vendors who will receive the RFQ.
Selecting the vendors
Step 1
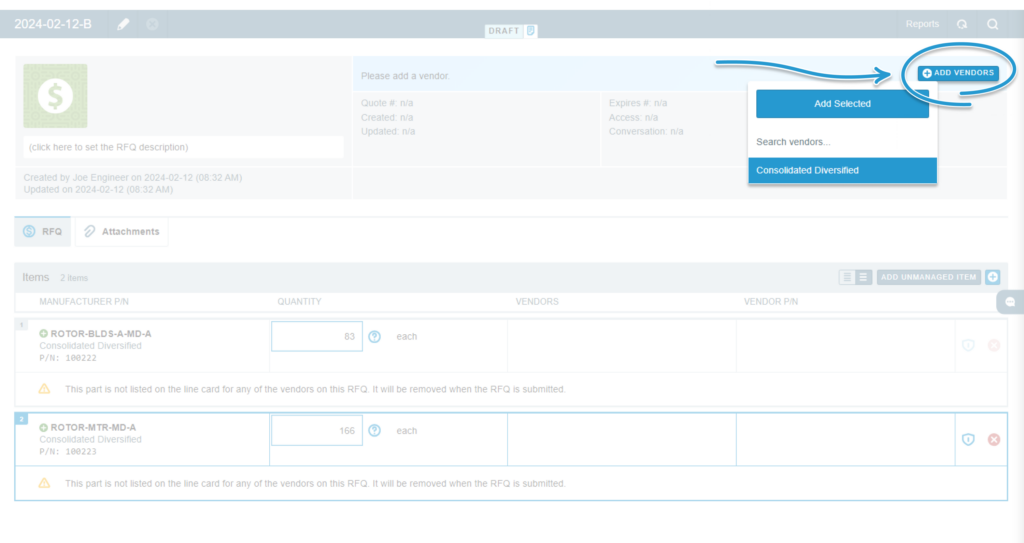
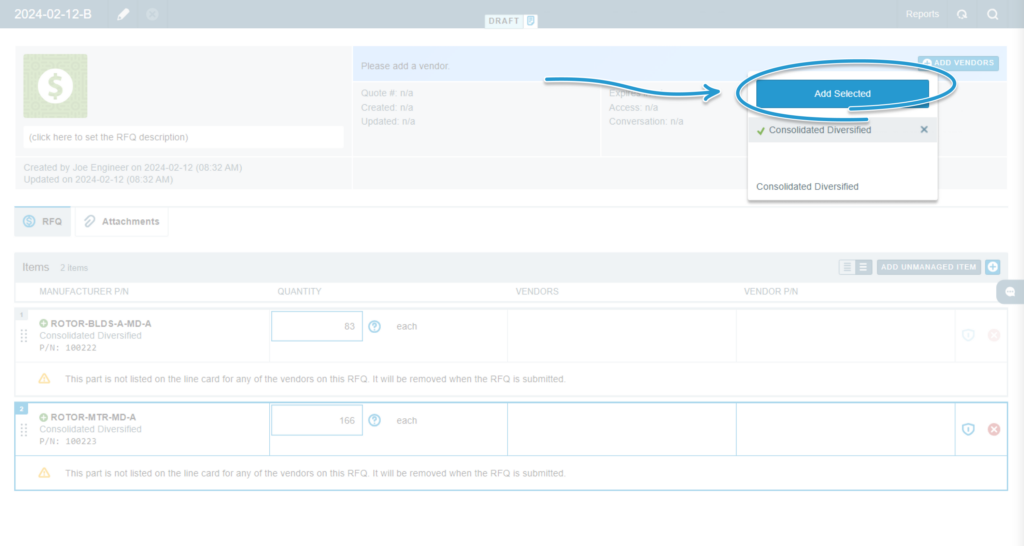
On the RFQ screen, navigate to the top right corner of the screen to click the ‘Add Vendors’ button. This will open a small search field below the button.
Step 2
Type in the name of the vendor to send the quote to. For this exercise, we are using the company Consolidated Diversified.
Tip: Aligni offers vendor suggestions as characters are typed in the form fields to quickly locate companies.
Step 3
Once the name is typed in or the correct vendor name is suggested and clicked on, press the ‘Add Selected’ button above the name.
Tip: If there is a part in the RFQ that is not assigned to a vendor or the assigned vendor is not selected for the RFQ, the part will not be sent out to quote.
Tip: more than one vendor can be added to the RFQ. This can be done by repeating the steps to add the first vendor above until all the vendors needed are selected.
The search field will now close and the vendor name will appear towards the top center of the RFQ screen.
Sending the RFQ
Step 1
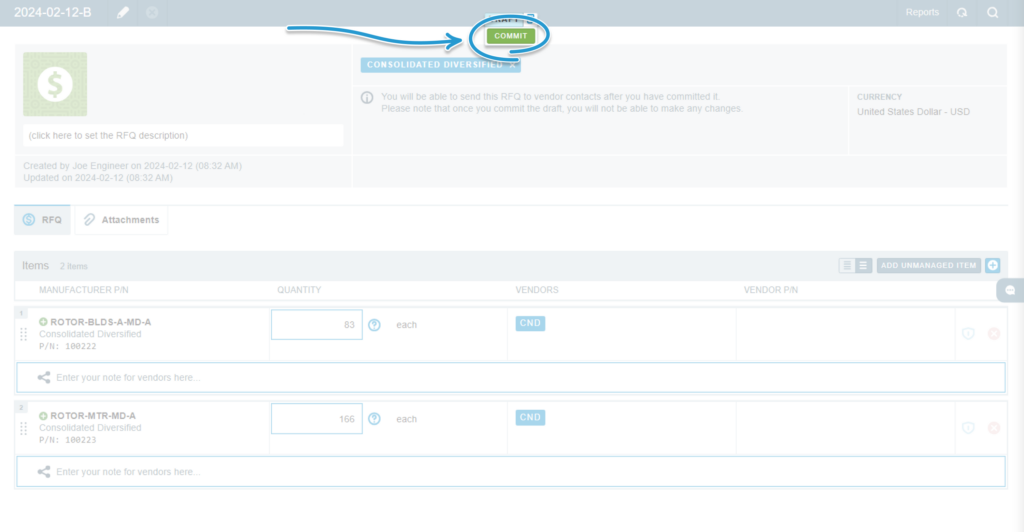
To be able to send the RFQ from Aligni, it has to be switched from ‘DRAFT’ state to the ‘COMMIT’ state.
Tip: An RFQ in draft can be changed as much as desired. Once an RFQ leaves the draft state, it cannot be altered or updated.
Step 2
This can be done by clicking on the ‘COMMIT’ button in the center of the screen, above the vendor name.
Step 3
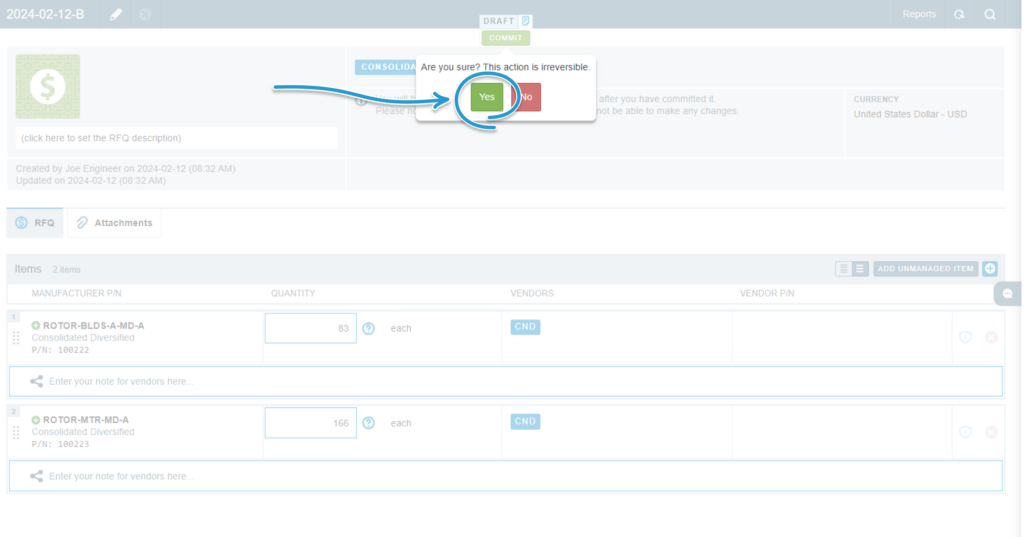
A confirm button will appear to make sure this is what you’d like to do. Click ‘Yes.’ Now the RFQ is committed.
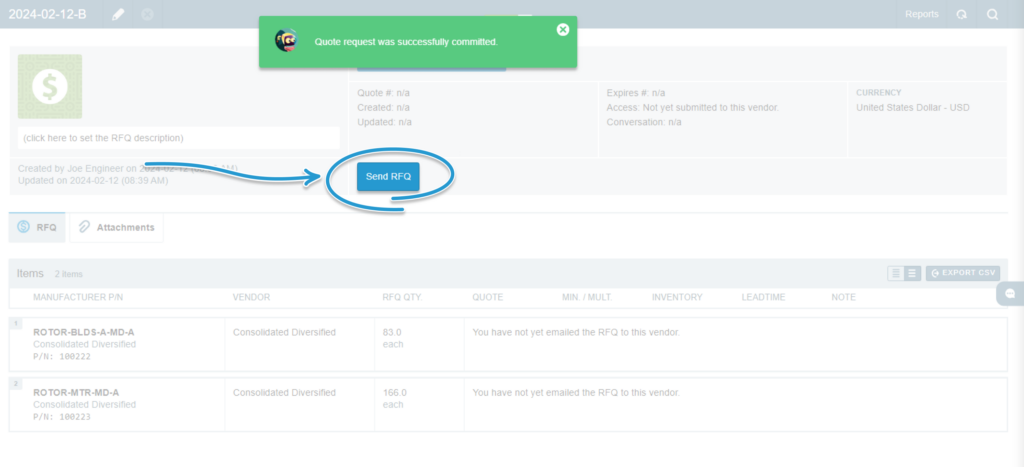
After the draft has been committed, the ‘Send RFQ’ button appears below the vendor names. This indicates the RFQ is ready to be sent to vendors for quoting.
Step 4
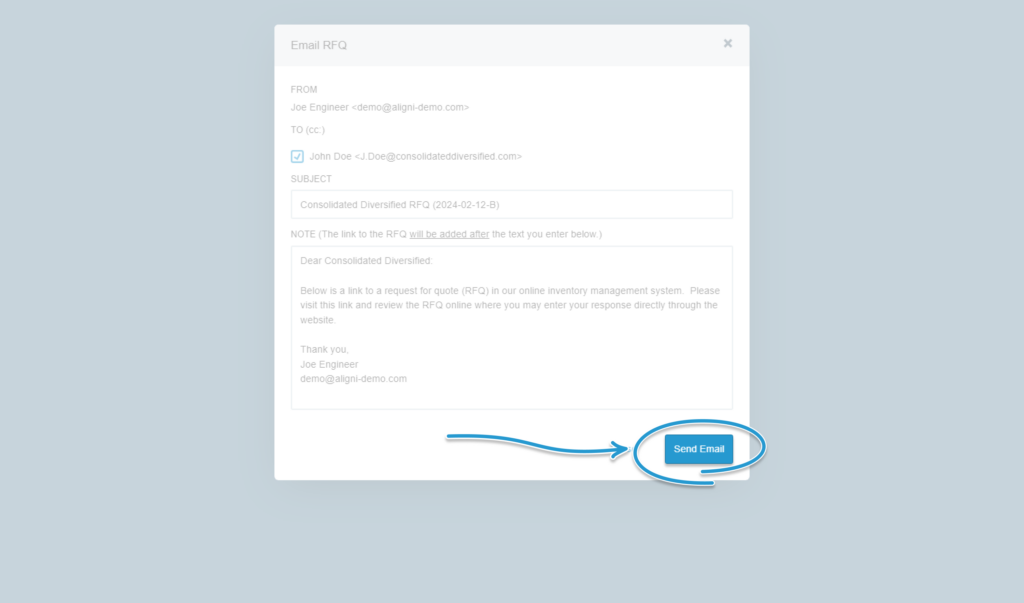
Clicking on the ‘Send RFQ’ button opens the ‘Email RFQ’ form. This form is designed to operate like an email with from, to, subject, and note sections.
Tip: the default text within the ‘Email RFQ’ form can be changed within the settings in the system. It can also be changed in the ‘Email RFQ’ form itself.
Tip: if there are no vendor contacts selected to receive quotes, then the system will not send RFQs to that vendor.
Tip: the vendor recipient (who will receive the quote) is determined in the ‘Relationships’ section of the application where the vendor’s contacts are listed. Companies can select which vendor contacts can receive quotes and who are the preferred contacts for each vendor.
Once everything in the ‘Email RFQ’ form looks correct, pressing the ‘Send Email’ button sends the RFQ to the vendor.
Learn more about purchasing operations in the Aligni system
Introducing the Aligni Vendor Portal
Using Aligni’s ActiveQuote to manage quoting activities
Mastering the Aligni Item Master Database
Other Pages in Quick Start Guide: Create a Request for Quote (RFQ)
- Basics
- Bespoke Support
- Engineering Change Management
- Free Aligni for Open-Source Hardware Projects
- FusePLM Migration
- GraphQL API
- Parts & Vendors Conversion
- Privacy Policy
- Quality Control
- Quick Start Guide: Create a Bill of Materials
- Quick Start Guide: Create a new part
- Quick Start Guide: Create a new vendor
- Quick Start Guide: Create a production build
- Quick Start Guide: Create a Request for Quote (RFQ)
- Spreadsheets Migration
- Vendor
- Parts
- Guides
- API
- ActiveQuote
- Support

