While most organizations create BOMs though importing lists from engineering packages, Aligni users can also build one themselves.
But first, build a product
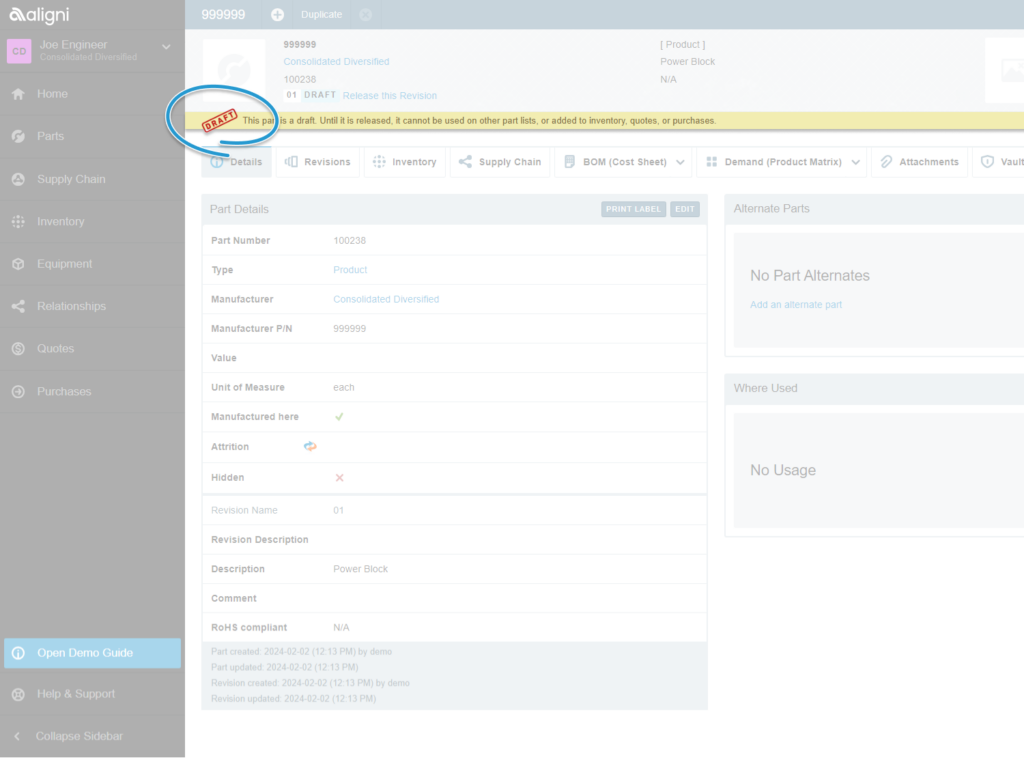
The first step in building a BOM in Aligni is to create a product in the system.
Tip: In Aligni, parts, products, assemblies and subassemblies are all considered ‘parts’
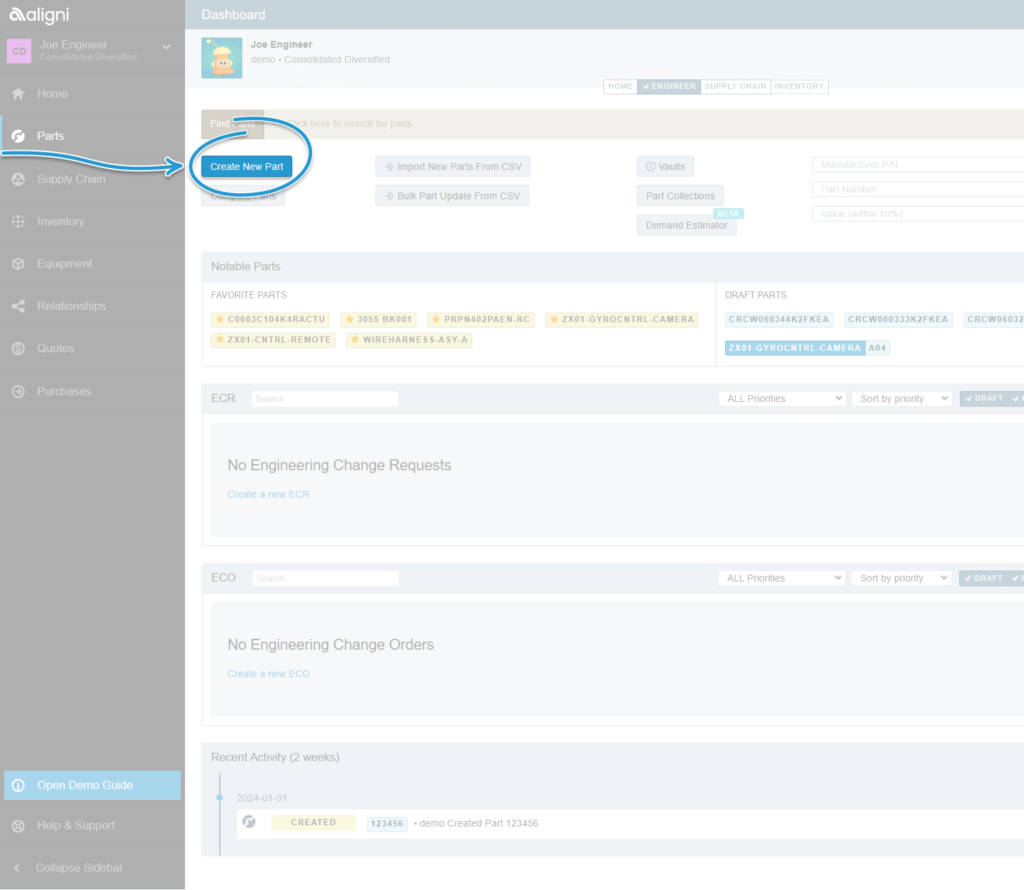
Step 1
In the engineer tab, click on ‘Create New Part’ This will open the Create New Part form.
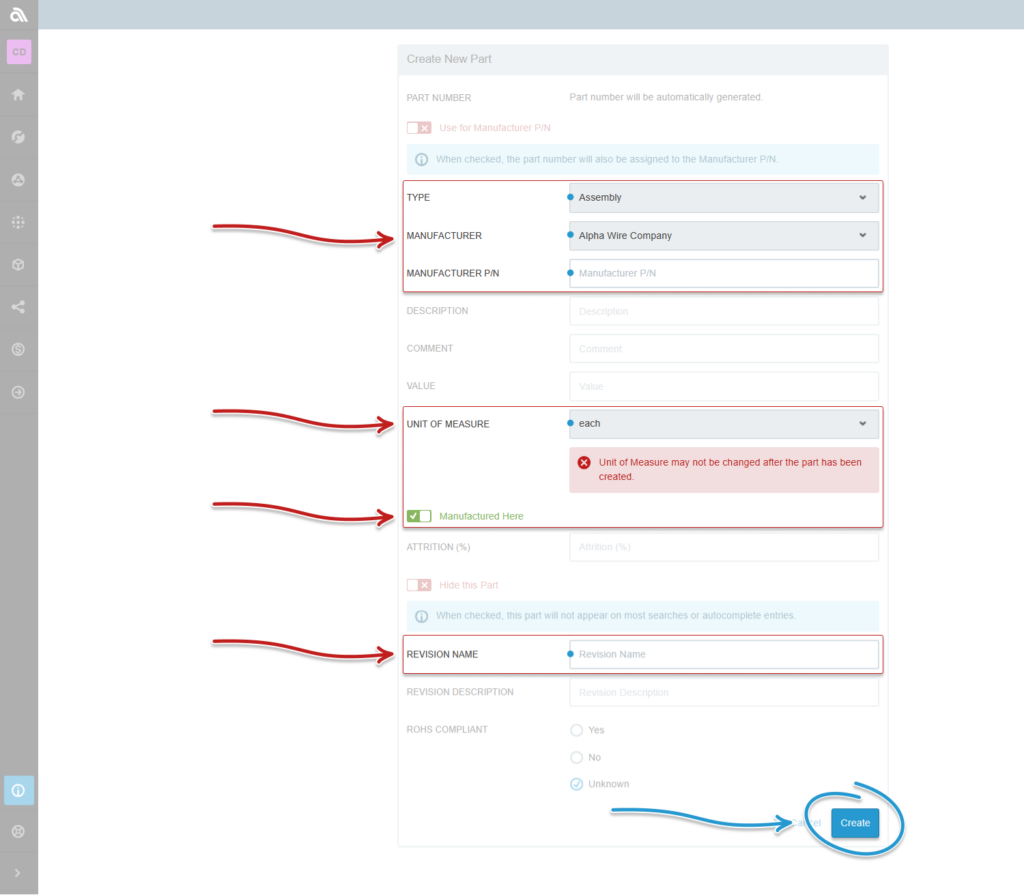
Step 2
Fill out the details of the new part. This will be your product that a BOM will be built for.
The fields with the blue dot at the beginning are required. These have to be filled out in order for the system to accept the new part (product).
Building the Parts List
Step 1
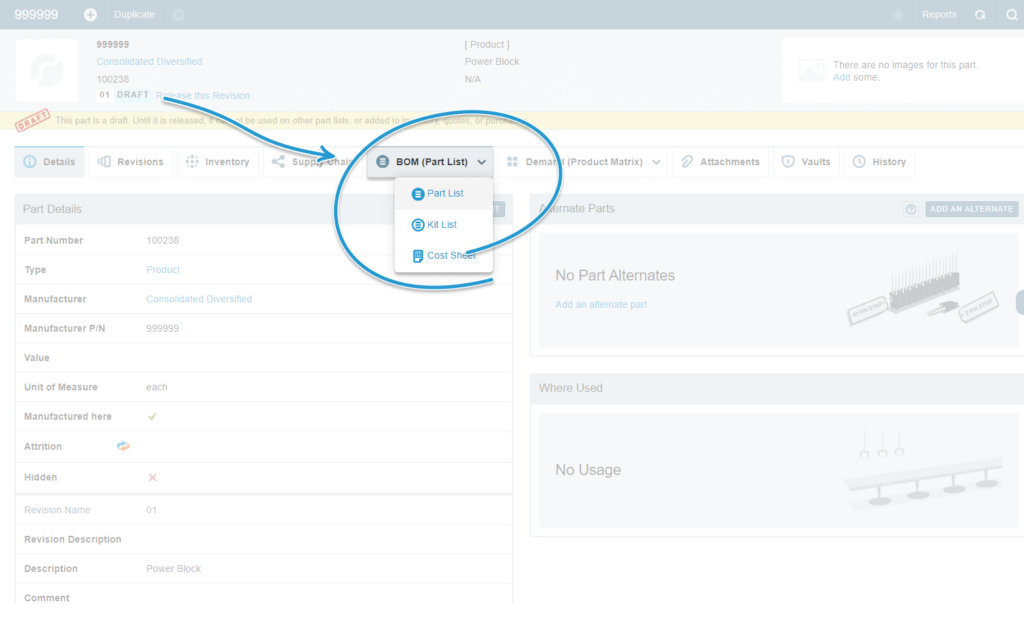
To add parts to the newly created product, click on the down arrow on the ‘BOM (Part List)’ tab on the Part (product) page. This opens a menu with three choices. Click on the ‘Part List’ Option.
Step 2
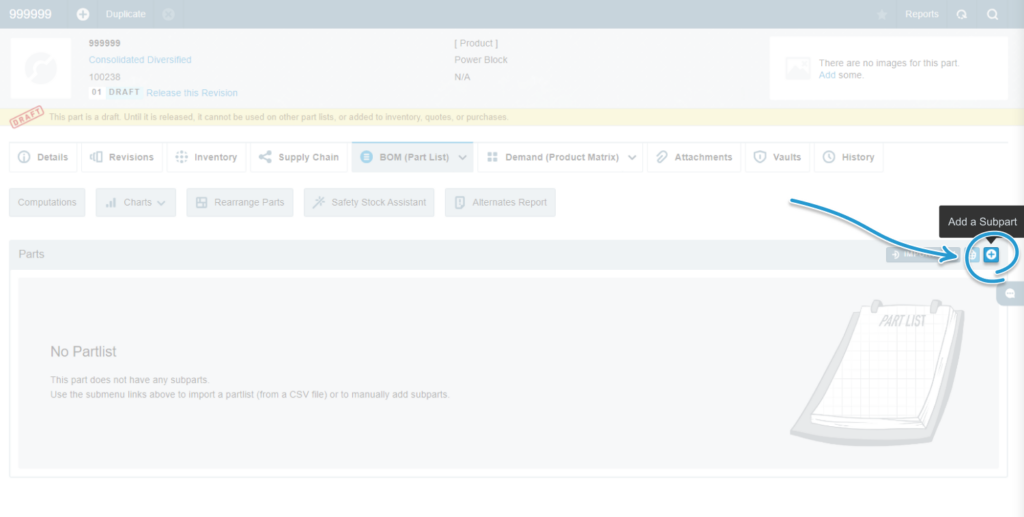
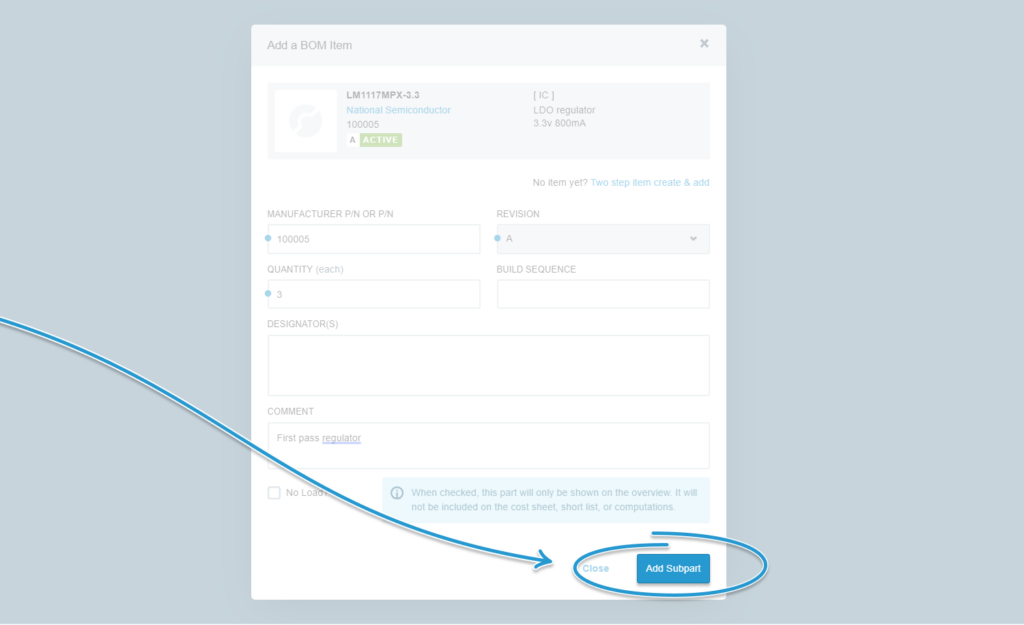
Clicking on the ‘Add a Subpart’ button at the far right of the Parts section opens the ‘Add a BOM Item’ form. From this form, parts can be added to the newly created product’s BOM.
Step 3
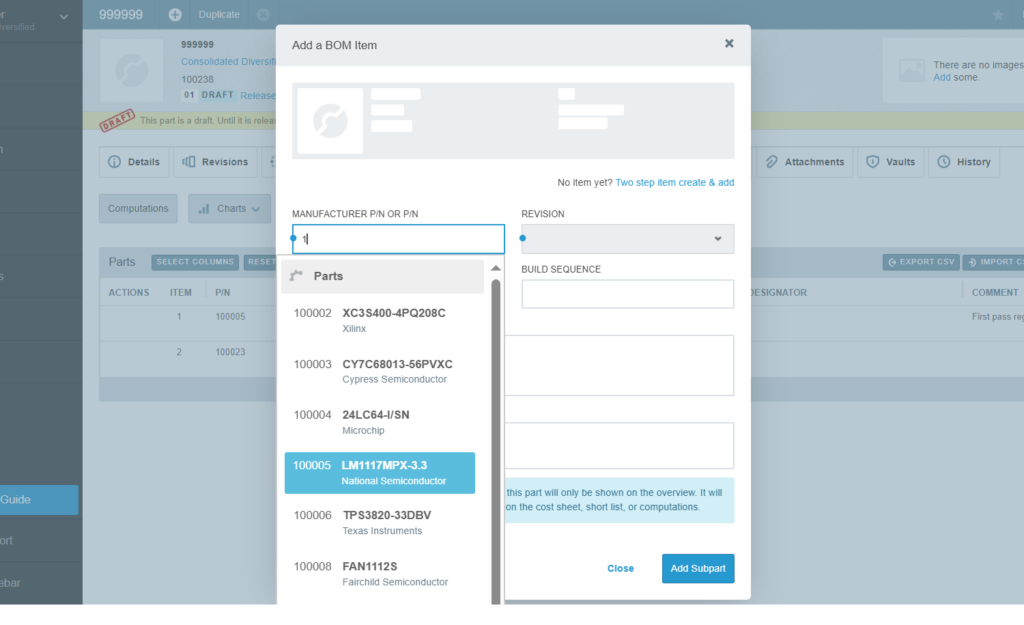
Begin adding a part by typing in the part number or manufacturer’s part number in the first field.
Tip: Aligni offers part suggestions as numbers or characters are typed in the form fields to quickly locate parts.
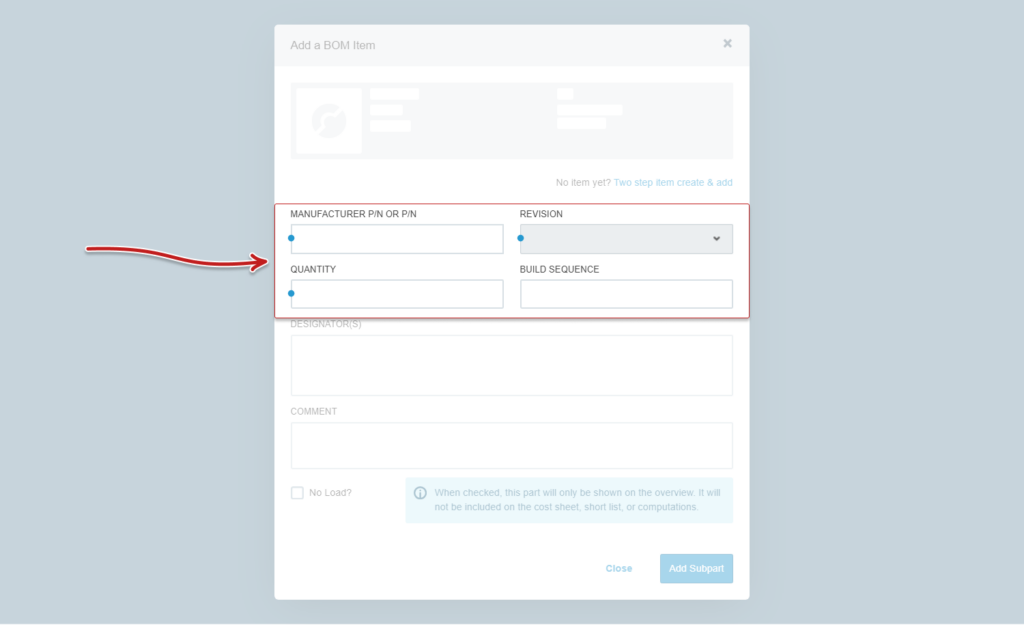
Tip: The fields that have a blue dot at the left are required fields.
Step 4
Then add in the quantity of part needed and which revision level.
Tip: Aligni provides the ability to add designators or comments to each of the parts added to the BOM if needed.
Step 5
Once the part is chosen and the relevant information is keyed into the form, press the ‘Add Subpart’ button at the bottom right of the form.
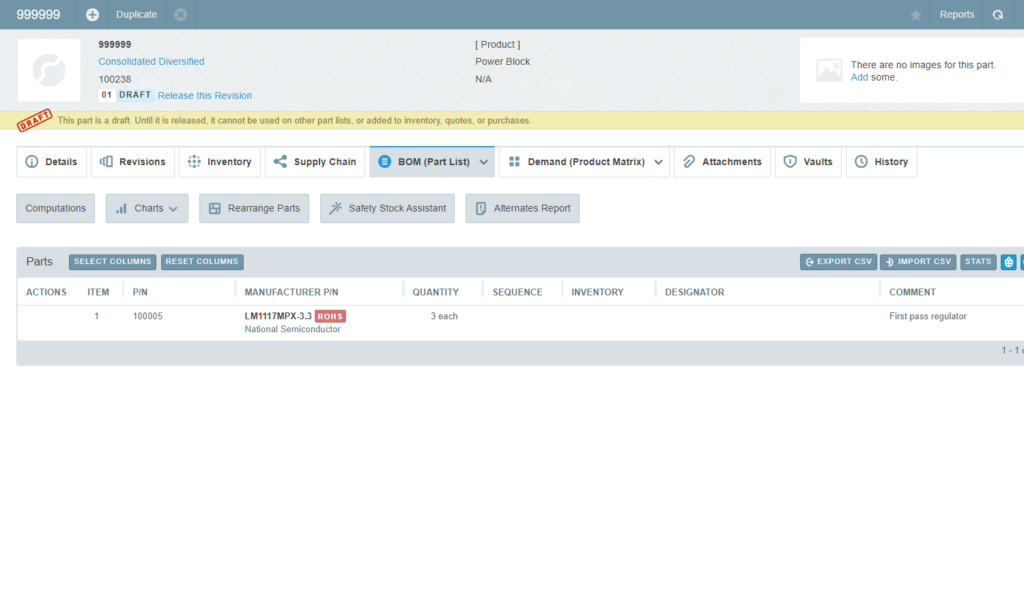
The part just entered now appears on the product’s Part List (BOM). Follow the same steps to add the remaining parts that are needed to complete the BOM.
Step 6
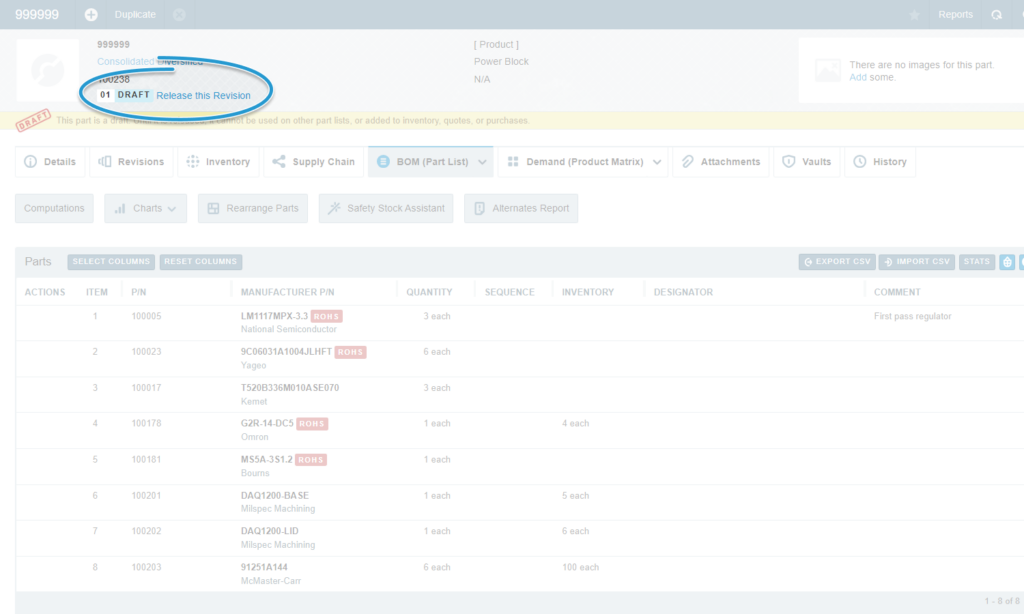
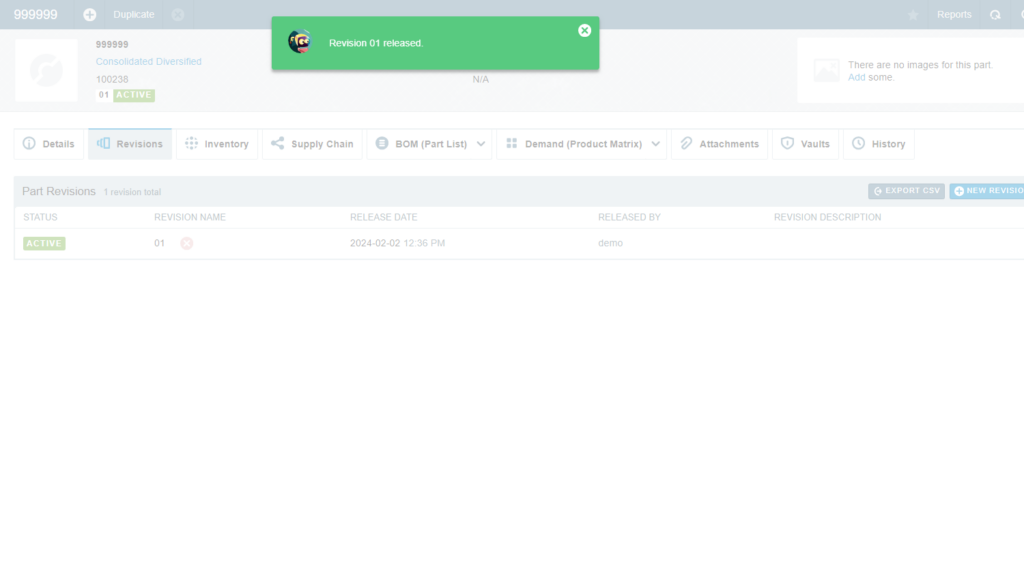
Once the list is complete, it’s time to release the product. Navigate to the upper left corner of the screen and click ‘Release this Revision’
Step 7
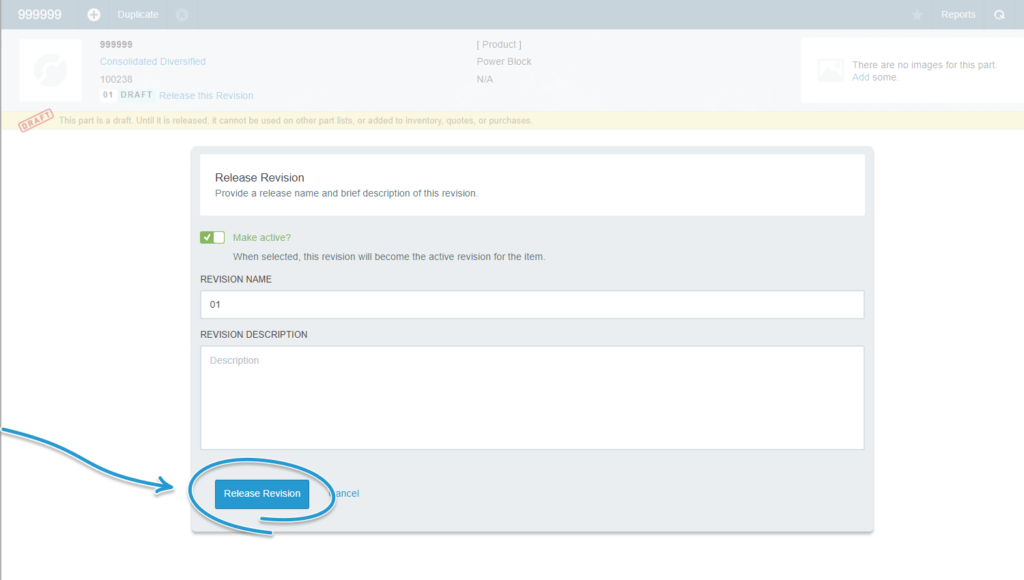
This opens the Release Revision dialog box. Here you can add a revision level or add a description for the revision.
When complete, press the “Release Revision’ button.
Learn more about Bills of Materials in the Aligni system
Mastering the Aligni Item Master Database
Other Pages in Quick Start Guide: Create a Bill of Materials
- Basics
- Bespoke Support
- Engineering Change Management
- Free Aligni for Open-Source Hardware Projects
- FusePLM Migration
- GraphQL API
- Parts & Vendors Conversion
- Privacy Policy
- Quality Control
- Quick Start Guide: Create a Bill of Materials
- Quick Start Guide: Create a new part
- Quick Start Guide: Create a new vendor
- Quick Start Guide: Create a production build
- Quick Start Guide: Create a Request for Quote (RFQ)
- Spreadsheets Migration
- Vendor
- Parts
- Guides
- API
- ActiveQuote
- Support

